- What are {tags}?
- How to use tags?
- Using tags in conditional logic (video)
- Using tags with dropdowns, checkboxes and radio buttons
- Advanced tags (return multiple values)
- Regular expressions
- Predefined tags
- Where can I use tags?
What are {tags}?
The tags system in Super Forms is a very simple but yet very powerful feature that gives any form the flexibility you require.
With {tags} you can retrieve the value from a specific field in your form, either on the fly (live) to be displayed to the user instantly or upon form submission to be used in your form settings or inside your emails.
How to use tags?
A tag is written with the so called curly braces {}. In between the curly braces you can enter the unique field name of the element you wish to retrieve the value from.
When you have a field name called first_name and you want to retrieve this value in your email body you can retrieve it by placing {first_name} in the body.
Example:
Dear {first_name} {last_name},
...
The above would translate into:
Dear John Doe,
...
Using tags in conditional logic (video)
Using tags with dropdowns, checkboxes and radio buttons
With checkboxes, radio buttons and dropdowns this will work exactly the same way except that you will also have the ability to retrieve the label instead of the value.
Let's say you added a checkbox element with the following options:

The left value is the option label and on the right value is the option value.
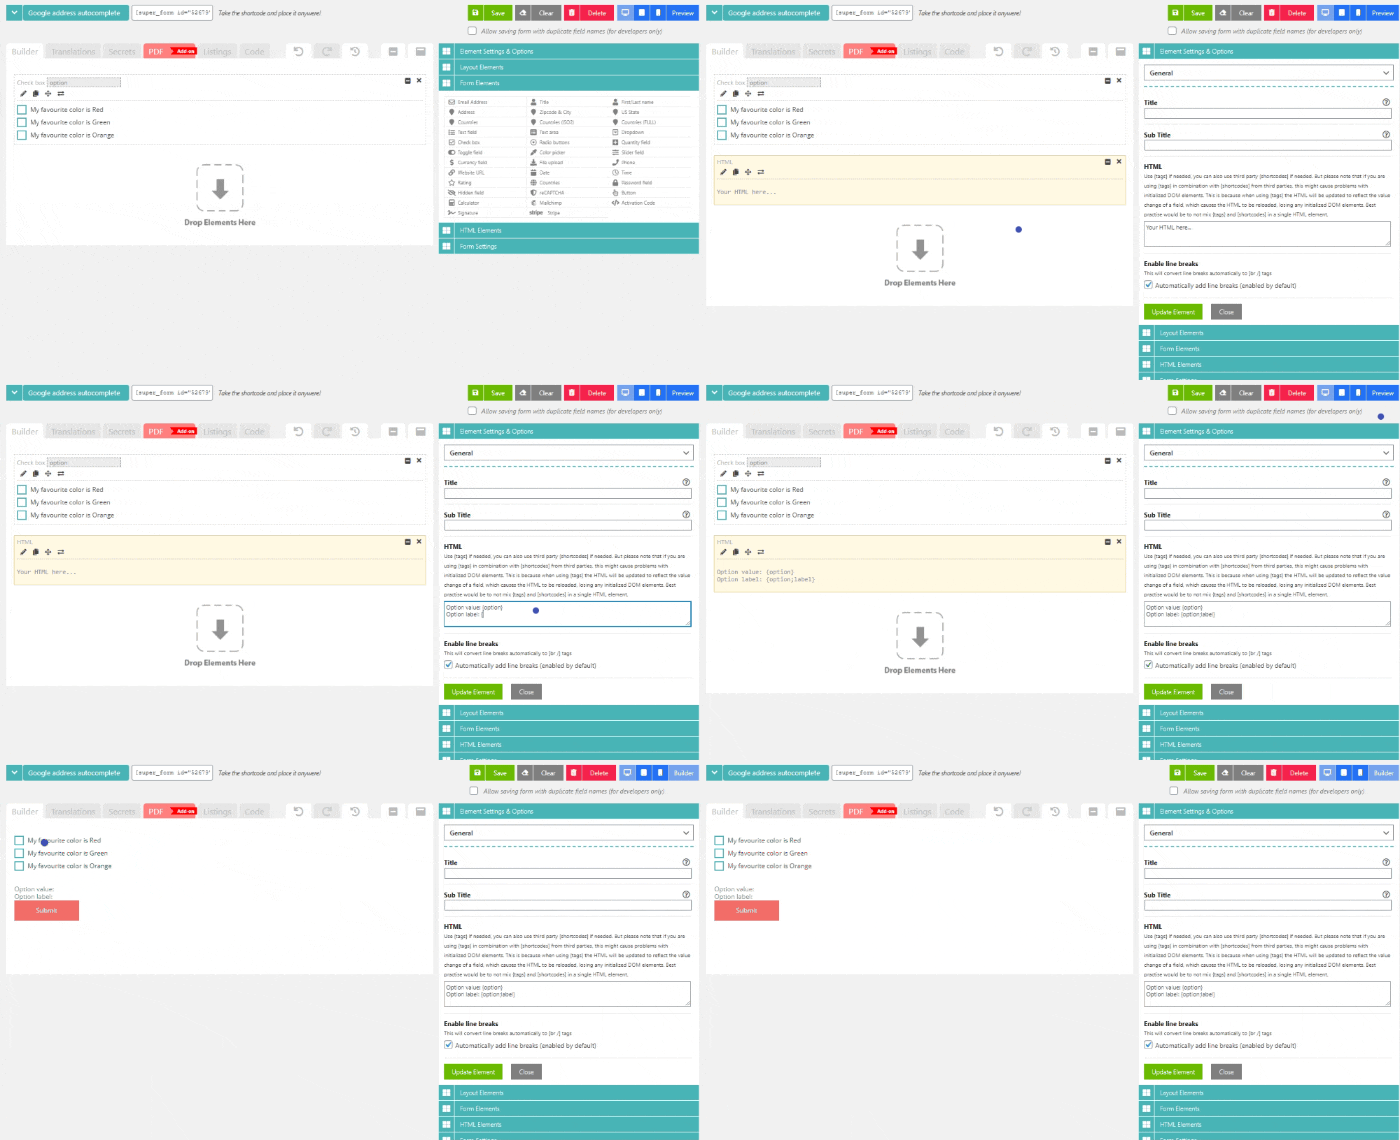
If you would name your checkbox fav_color then you would retrieve the selected option values with the tag {fav_color}. But if you want to retrieve the label you can use {fav_color;label} instead.
A simple way to test this out is by adding a HTML element with the above tags inside it and selecting any of the checkbox items. The HTML element will automatically be updated to whatever option was chosen from the checkbox.
Advanced tags (return multiple values)
Another feature you have with checkboxes, radio buttons and dropdowns is to save multiple values per option value. In order to do this the only thing you will have to do is separate each option value with a semicolon ;.
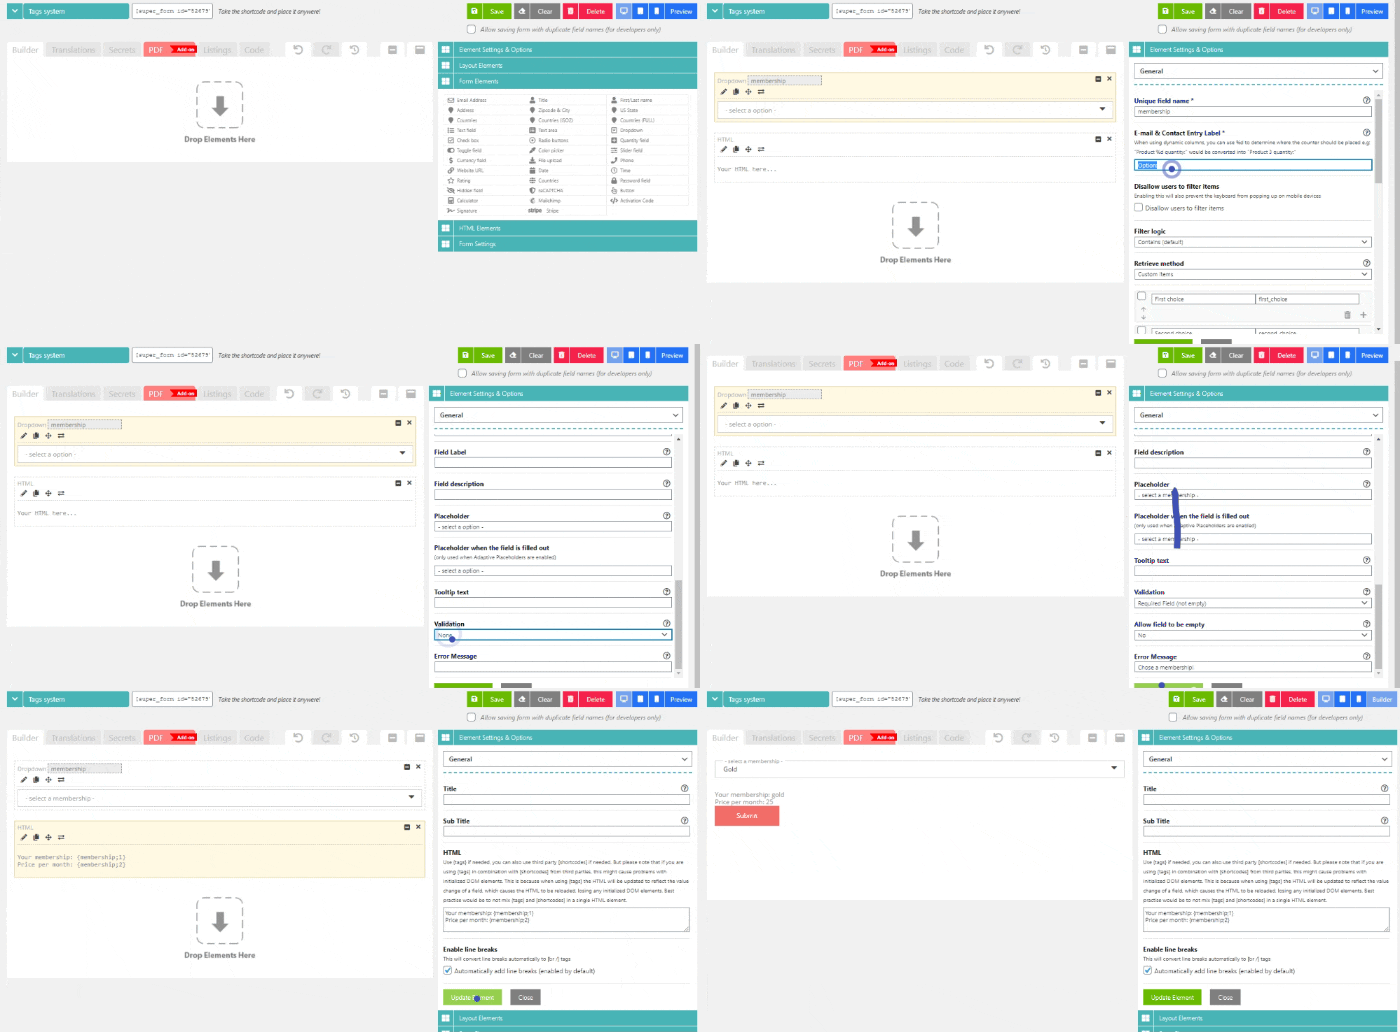
For instance, when you sell multiple packages based on a specific membership, you might need a different price per membership. Let's say we have a Standard membership and a Gold membership. We will ask the user to select a package. We will use a dropdown field so the user can select the according membership.
The dropdown will be named membership and will have 2 items with Label / Value:
Standard/standard;10Gold/gold;25
Now whenever the user has selected an item from the dropdown, we can retrieve the correct price depending on their membership.
- To retrieve the Standard membership price we would use the tag
{membership;2}which would return10 - To retrieve the Gold membership price we would also use the tag
{membership;2}which would return25
Regular expressions
The Calculator Add-on makes it possible to use regular expressions on tags. To read more about this visit the Calculator Add-on documentation.
Predefined tags
| {****} or {field_****} |
Retrieves the field value, where **** is the field name |
| {loop_fields}, {loop_label}, {loop_value} |
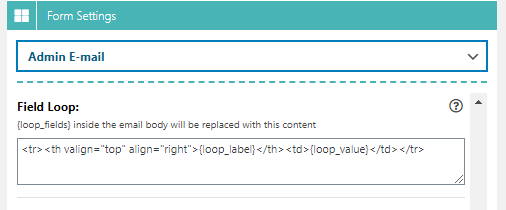
Loop over all submitted form data inside Emails, {loop_label} returns the field Label inside the loop, while {loop_value} will return the field value.
|
| {datepicker_field_name;timestamp} |
Retrieve the timestamp from datepicker value |
| {option_admin_email} |
Email address of blog administrator |
| {option_blogname} |
Weblog title; set in WordPress > Settings > General |
| {option_blogdescription} |
Tagline for your blog; set in WordPress > Settings > General |
| {option_blog_charset} |
The blog Charset |
| {option_date_format} |
The date Format |
| {option_default_category} |
Default post category; set in WordPress > Settings > Writing |
| {option_home} |
The blog's home web address; set in WordPress > Settings > General |
| {option_siteurl} |
The WordPress web address; set in WordPress > Settings > General |
| {option_template} |
The current theme's name |
| {option_start_of_week} |
Start of the week |
| {option_upload_path} |
The default upload location |
| {option_posts_per_page} |
Posts per page |
| {option_posts_per_rss} |
Posts per RSS feed |
| {contact_entry_id} |
Contact entry ID that was created after submitting form (this tag can only be used in the "Success message" and inside your Emails) |
| {post_title} | Current page or post title |
| {post_id} | Current page or post ID |
| {post_permalink} | Current post URL (permalink) |
| {post_author_id} | Current post author ID |
| {post_author_email} | Current post author Email address |
| {post_meta_****} |
Current post custom meta data |
| {post_term_names_****} |
Current post term names based on taxonomy name **** |
| {post_term_slugs_****} |
Current post term slugs based on taxonomy name **** |
| {post_term_ids_****} |
Current post term ID's based on taxonomy name **** |
| {user_login} |
Currently logged in user username |
| {user_email} |
Currently logged in user email address |
| {user_firstname} |
Currently logged in user first name |
| {user_lastname} |
Currently logged in user last name |
| {user_display} |
Currently logged in user display name |
| {user_id} |
Currently logged in user ID |
| {user_roles} |
Currently logged in user roles |
| {user_meta_****} | Currently logged in custom user meta data |
| {real_ip} | IP-address of the form submitter |
| {wc_cart_total}, {wc_cart_total_float}, {wc_cart_items}, {wc_cart_items_price} | Cart information (when WooCommerce is installed and activated) |
| {submission_count} | Total submission count (if form locker is used) |
| {last_entry_id} | Latest Contact Entry ID that was created for this form |
| {last_entry_status} | Latest Contact Entry status that was created for this form |
| {user_last_entry_id} | Latest Contact Entry ID that was created by the logged in user |
| {user_last_entry_status} |
Latest Contact Entry status that was created by the logged in user |
| {server_http_referrer} |
Retrieve the previous location (URL) where the user navigated from before landing on the page with the form |
| {server_http_referrer_session} |
Retrieves the {server_http_referrer} tag into a session, so it will not be subject to change after navigating away and returning back at later time |
| {server_timestamp_gmt}, {server_day_gmt}, {server_month_gmt}, {server_year_gmt}, {server_hour_gmt}, {server_minute_gmt}, {server_seconds_gmt} |
Current date values in server timestamp (UTC/GMT) |
| {server_timestamp}, {server_day}, {server_month}, {server_year}, {server_hour}, {server_minute}, {server_seconds} |
Current date values in server timestamp (Local time) |
| {pdf_page}, {pdf_total_pages} |
Retrieve the current and total PDF pages for PDF Add-on only |
Where can I use tags?
You can use tags almost everywhere within your form, a couple examples are:
- Inside your Email bodies, Subjects, and all other email headers you could think of
- In combination with Email if statements and or Email foreach loops
- Within your HTML elements (to display it to the user as a summary, or to just debug your form)
- Inside the Success Message that is displayed to the user after a successful submitted form
- In combination with Variable fields and also within the conditional logic statements
- When redirecting form to a custom URL to add dynamic parameters e.g:
domain.com/?first-name={first_name}&last-name={last_name} - In validation option for text fields to conditionally check for same value as other field (to compare two field values)
- You can use tags when saving contact entries with a custom title
- As Default value for Text fields or Hidden fields
- In combination with the Register & Login Add-on for Super Forms
- In combination with the WooCommerce Checkout Add-on
- Or with any of the Add-ons that might support the use of tags
Comments
0 comments
Please sign in to leave a comment.